
Lawrence Wood Flooring has handled hardwood floor installation in Lawrence, MA for 20+ years, serving surrounding cities including Methuen, Andover, Haverhill, Lowell, Boxford. We install solid and engineered hardwood in single-family homes, two-families and condo units, and we start every job by checking what is underneath, because a new floor is only as flat and quiet as the subfloor it sits on.
The choices that matter most are made before a single board is nailed down: solid or engineered, prefinished or site-finished, which species and width, and how the floor will be fastened. We walk you through those decisions with samples and a written estimate, so the floor you end up with suits the room and how you live in it.
Choosing the Right Hardwood
Solid Hardwood
Solid hardwood is one piece of wood from top to bottom, and it can be sanded and refinished many times over its life. Red oak strip flooring, white oak and maple are the most common choices, and each has its own grain, color and hardness.
Solid boards belong on framed floors above grade. They respond to humidity more than engineered boards, which is why we plan acclimation carefully and leave the expansion gap they need at the walls.
Engineered Hardwood
Engineered hardwood is a real wood wear layer bonded to a layered core. It moves less with changes in humidity, which makes it the better choice below grade, over concrete, over radiant heat and in some condo buildings.
The thickness of the engineered wear layer decides how many times the floor can be sanded later. We show you the difference between products so the choice is made knowing what it means for the life of the floor.
Species and Board Width
Red oak is the most familiar floor in older New England homes, with a pinkish tone and open grain. White oak is a little harder, takes darker stains evenly and is popular in wide plank. Maple is hard and smooth but can blotch under dark stain, so we usually recommend it natural or lightly colored.
Wider boards show more of the grain and suit open rooms, but they also move more across their width. We match the board width to the room and the subfloor rather than to the showroom alone.
Prefinished or Site-Finished
Prefinished Floors
Prefinished boards arrive with the stain and finish already applied at the factory. There is no sanding dust or finish odor on site, and the floor can usually be walked on as soon as it is installed.
The tradeoff is small beveled edges between boards and a finish that cannot be spot-sanded in the same way. When a prefinished floor eventually needs refreshing, a screen and recoat is often the first step.
Site-Finished Floors
Site-finished floors are installed raw, then sanded flat and stained and finished in place. The result is a smooth surface with a continuous finish that seals the joints between boards.
Site finishing also gives full control over color, because we lay stain samples on the installed floor in your own light before choosing. It takes more days and involves sanding, so we plan the schedule and dust control with you up front.
Preparing the Subfloor
Flatness and Fastening
A hump or dip in the subfloor will show through as a hollow spot, a rocking board or a squeak. We check the subfloor for flatness, refasten loose sheathing to the joists and correct problem areas before the new floor goes down.
Where old carpet is coming up, the pad, staples and tack strip are removed first. If we find old resilient tile or black mastic, that part of the job stops until the right trade has handled it.
Moisture and Acclimation
Wood boards need to reach a moisture level close to the room they will live in. We check the boards and the subfloor with a moisture meter against the manufacturer’s guidelines before installation, rather than nailing down boards straight off the truck.
Over a basement or crawlspace, we look for signs of moisture from below. Where the product calls for it, a vapor retarder goes down before the floor.
Bouncy and Sloping Floors
A new hardwood floor will not fix a bouncy or sloping floor, and it can make those problems more obvious. If the framing is flexing or the floor has settled significantly, we tell you and refer structural work out before installing.
How the Floor Is Installed
Nail-Down, Glue-Down and Floating
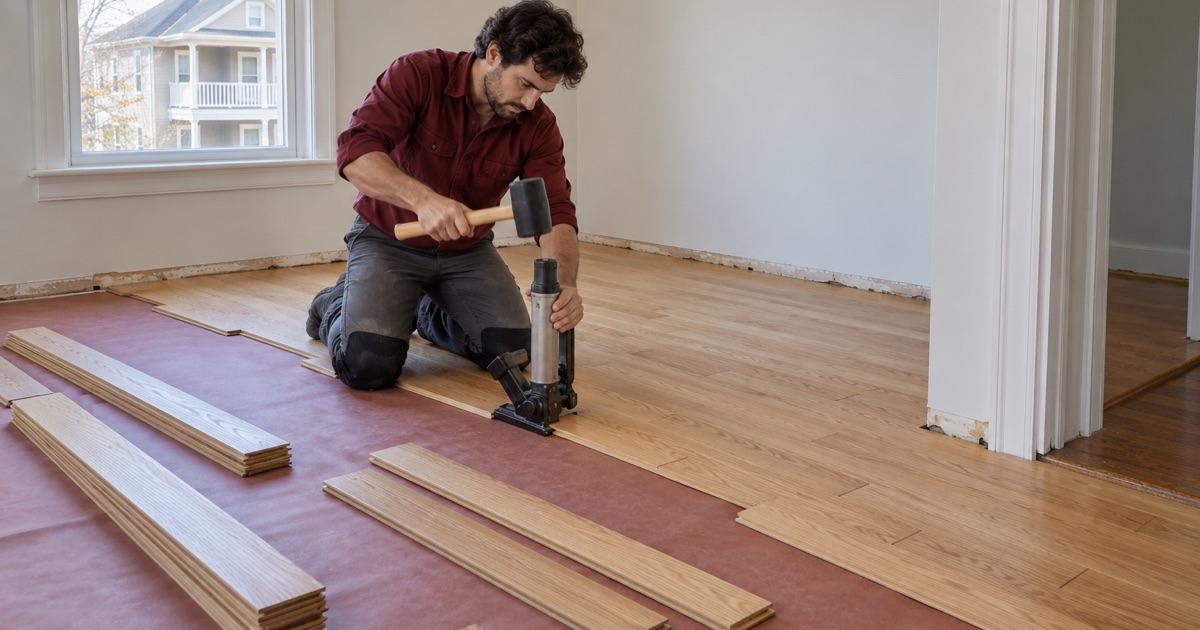
Solid hardwood over a plywood subfloor is usually nailed down. Engineered boards can be nailed, stapled, glued to concrete or floated over an underlayment, depending on the product and the subfloor. We follow the manufacturer’s instructions and the NWFA Installation Guidelines for the method, because the wrong installation can void the warranty and lead to a floor that moves.
Cleats, Staples and Layout
Flooring cleats and flooring staples hold boards in different ways, and many manufacturers specify which to use. The wrong fastener can split tongues or let boards loosen and squeak over time.
Layout matters too. We plan the starting line and the direction of the boards so the floor runs straight through doorways, ends with a sensible board width at the far wall and stays square to the main room.
Transitions and Trim
Thresholds, reducers, stair nosing and quarter round are what make a new floor look finished. We plan the heights at every doorway so there is no trip edge where hardwood meets tile or carpet, and we hide the expansion gap cleanly under trim.
Installing Next to an Existing Floor
Weaving New Boards Into Old
When a wall comes out or a room is added, new boards often have to meet an existing floor. We weave them in at staggered lengths rather than ending them in a straight line, then sand and finish the area together so the opening looks like one floor.
Matching Older Floors
Older floors may be narrower, wider or a different species from what is sold today. We match the species, width and thickness as closely as possible, using reclaimed or specially milled boards when standard stock will not match.
- 20+ Years on Wood Floors
- Itemized Written Estimates
- Old Pine and Oak Work